
The following guide is the first of a three part series to create a working ChatGPT alternative. The series will cover:
- Part 1 (this guide): Setup and configuration of a Cloud Server using Hetzner.
- Part 2: Setup and configuration of a containerised environment using
podmanto manage containers andtraefikto enable secure HTTPS access. - Part 3: Installation and setup of both OpenWebUI, a responseive front-end for Large Language Model (LLM) services and Open Router to manage and track API usage.
The purpose of this guide is to show how to create a Cloud Server using the Hetzner service. It should be noted that this post is not affiliated with Hetzner in anyway and certainly has not been approved by Hetzner! As a loyal customer for more than 10 years, I’m happy to write about their services.
Hetzner Cloud Services
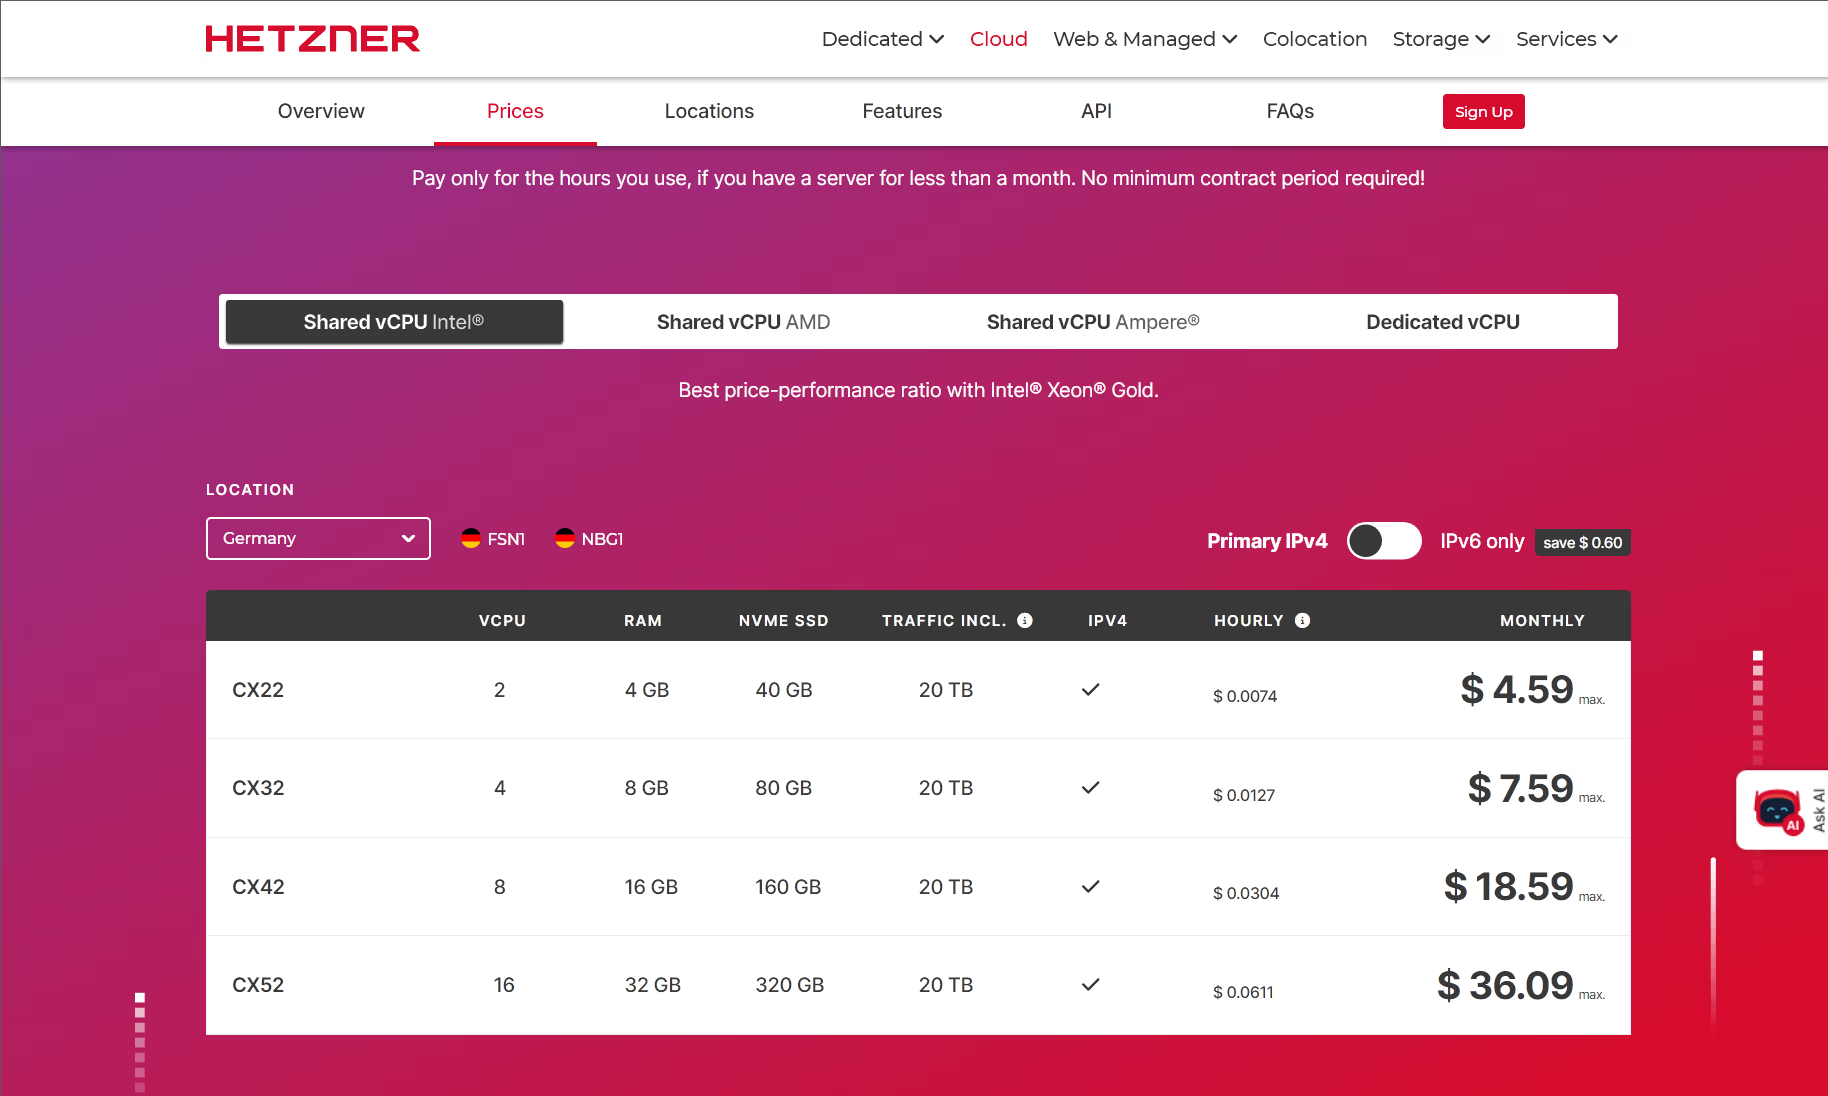
There are variety of cloud services offering Virtual Private Servers (VPS) such as Digital Ocean, Vultr and Linode. However, Hetzner offers competitive pricing for the hardware. There are four hardware segments [1]:
- Shared Intel vCPU (virtual Central Processing Unit).
- Shared AMD vCPU
- Shared Amphere (ARM based) vCPU
- Dedicated vCPU

The Shared CPUs mean that the resources are shared with others and as such maybe not be immediately available or their performance limited. The Dedicated vCPUs are guaranteed to be available and have a higher performance. For our use case of intermittent or even regular use of a Large Language Model (LLM) service, the Shared CPUs are sufficient. As the number of containers increase and/or demand does, there are other Hetzner offerings such as Dedicated Servers or extremely good value for money Server Auctions.
The majority of the Hetzner services are located in Germany with some in Finland and the USA. Based in the UK, the typical latency is around 40 ms and for those who are Value Added Tax (VAT) Registered, the VAT Rate is 20% Reversed Charged i.e. no VAT To pay.
The Intel based systems (based on older hardware) offer the cheapest option and 4GB of RAM is sufficient for our needs. We will later evaluate if these are sufficient or not and the methodology described can be used to select a different configuration if required. Note that all the services are offered with hourly billing, meaning if after a few hours we determine the performance is insufficient, we can delete the server and redeploy:
Cloud Server Creation
There are three methods in provisioning our cloud server, all of which require an account.
Depending on the type of service the account setup can take a few hours if additional identity documents are required.
The Cloud Server is one of many resources available such as fast storage, backups or snapshots and therefore a combination of these services is referred to as Projects:
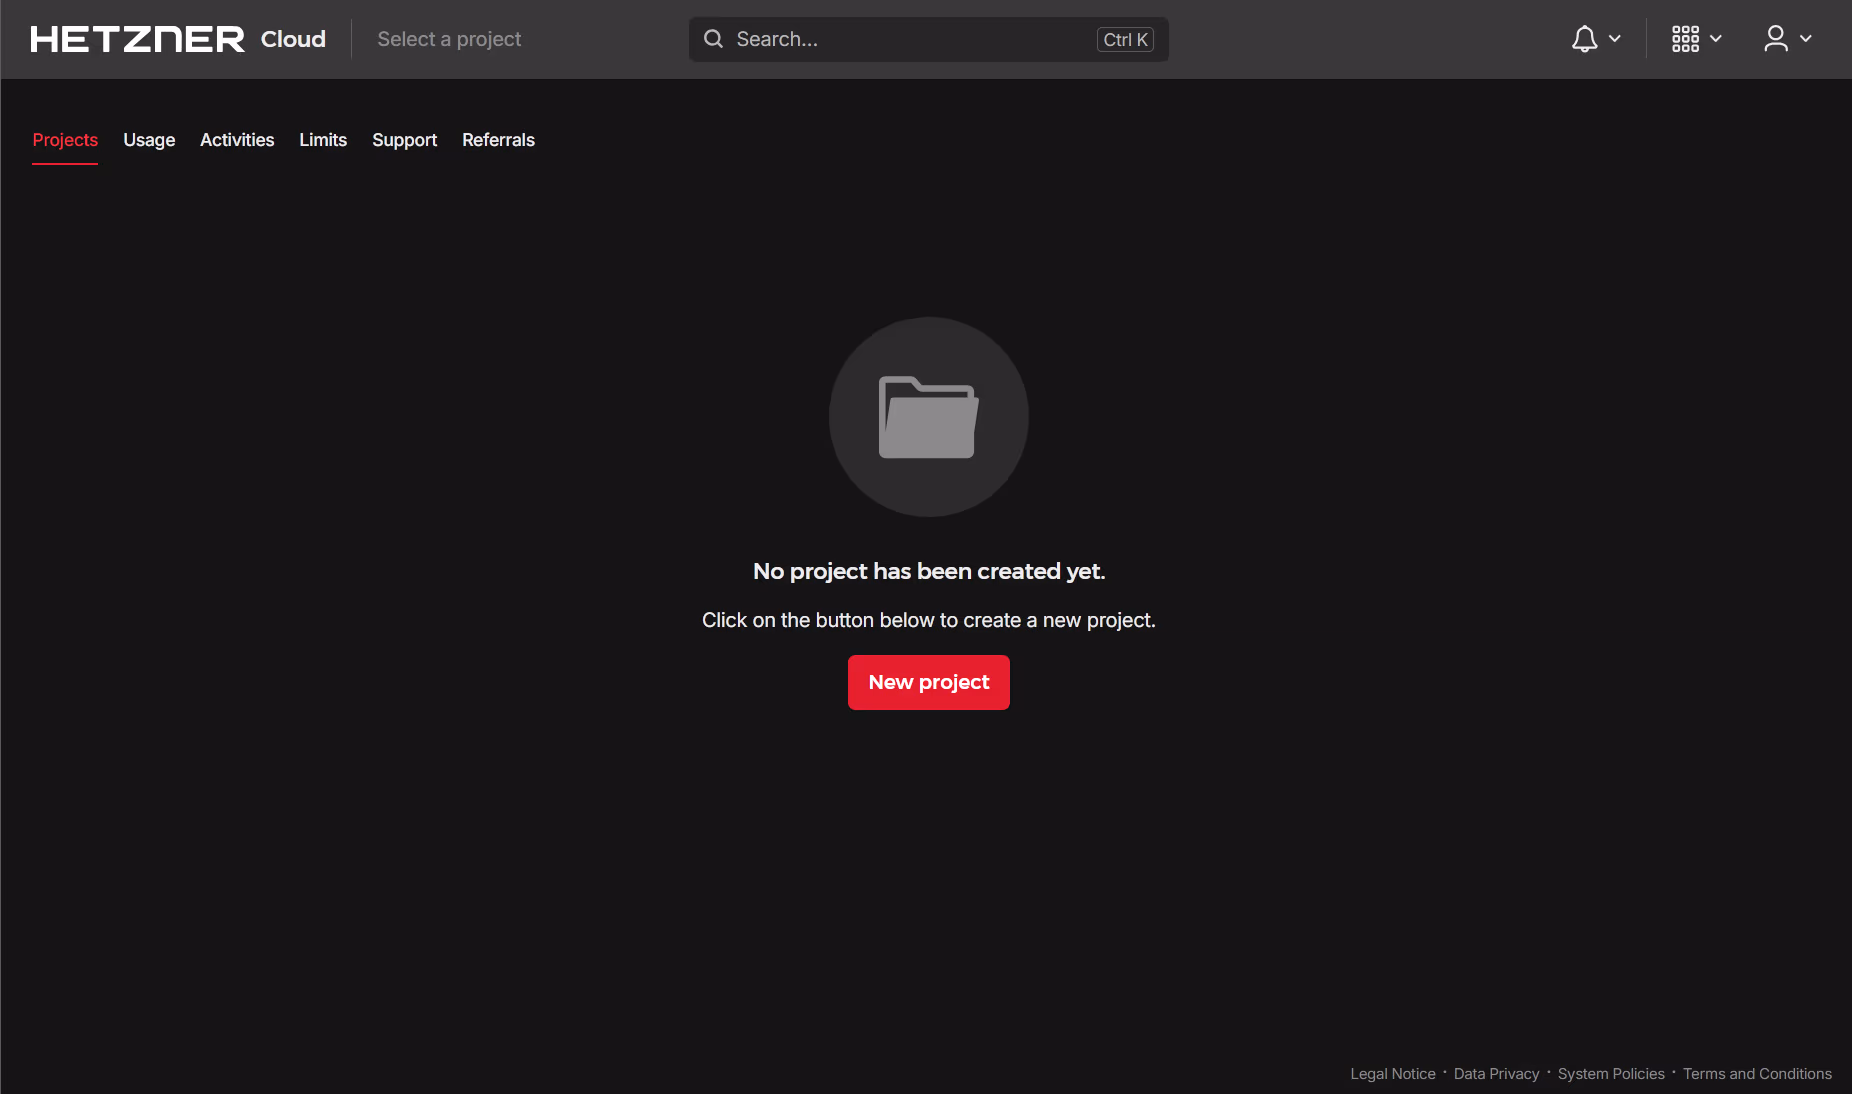
Click on the New Project button opens the Project Name pop-up:

This creates a project without allocating any resources:

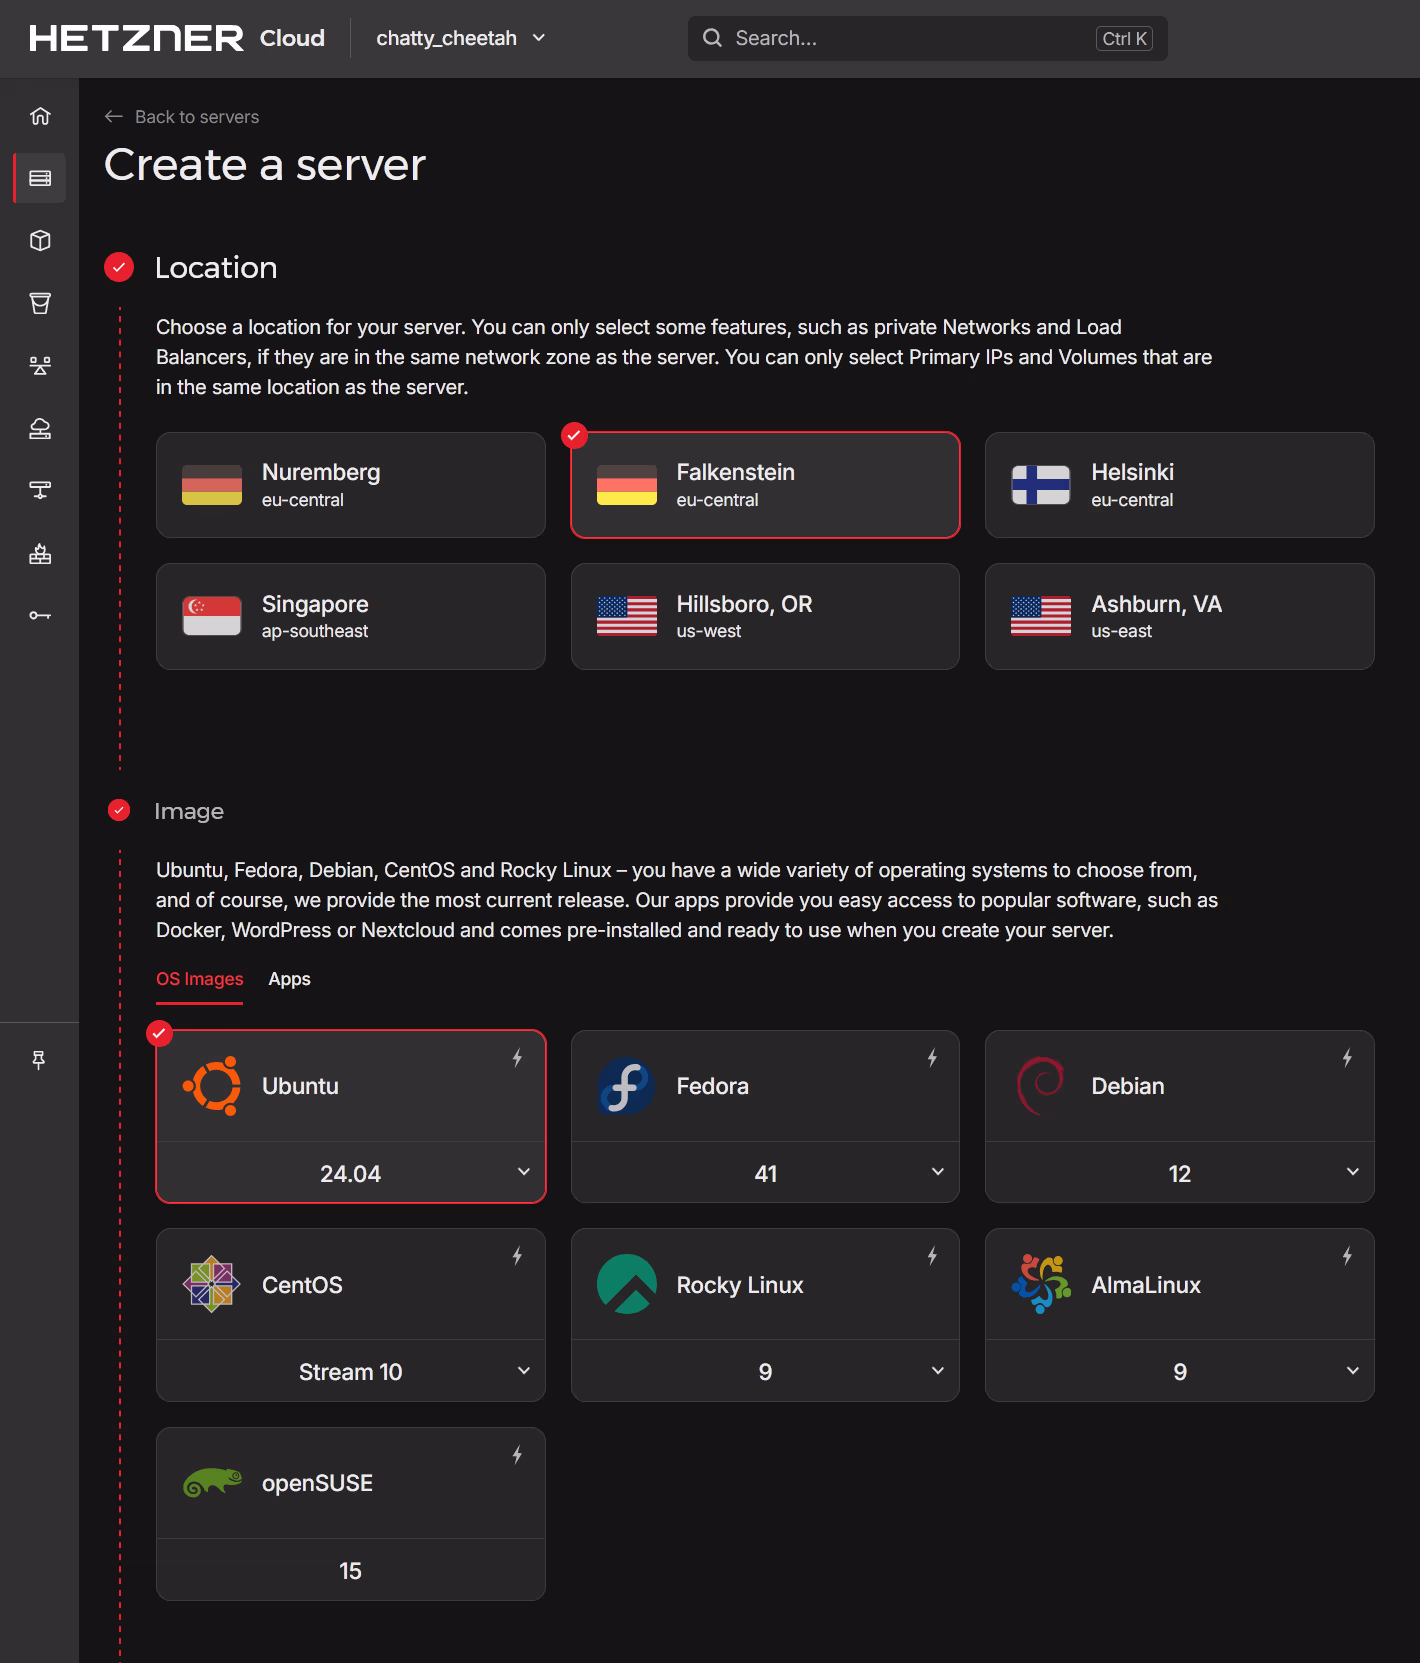
Click on the Project to configure the server details, namely the Location and the Image. Previous experience for my physical location suggests that Falkenstein is a good Data Centre and as I’m familiar with Ubuntu, I will select the latest Ubuntu image:
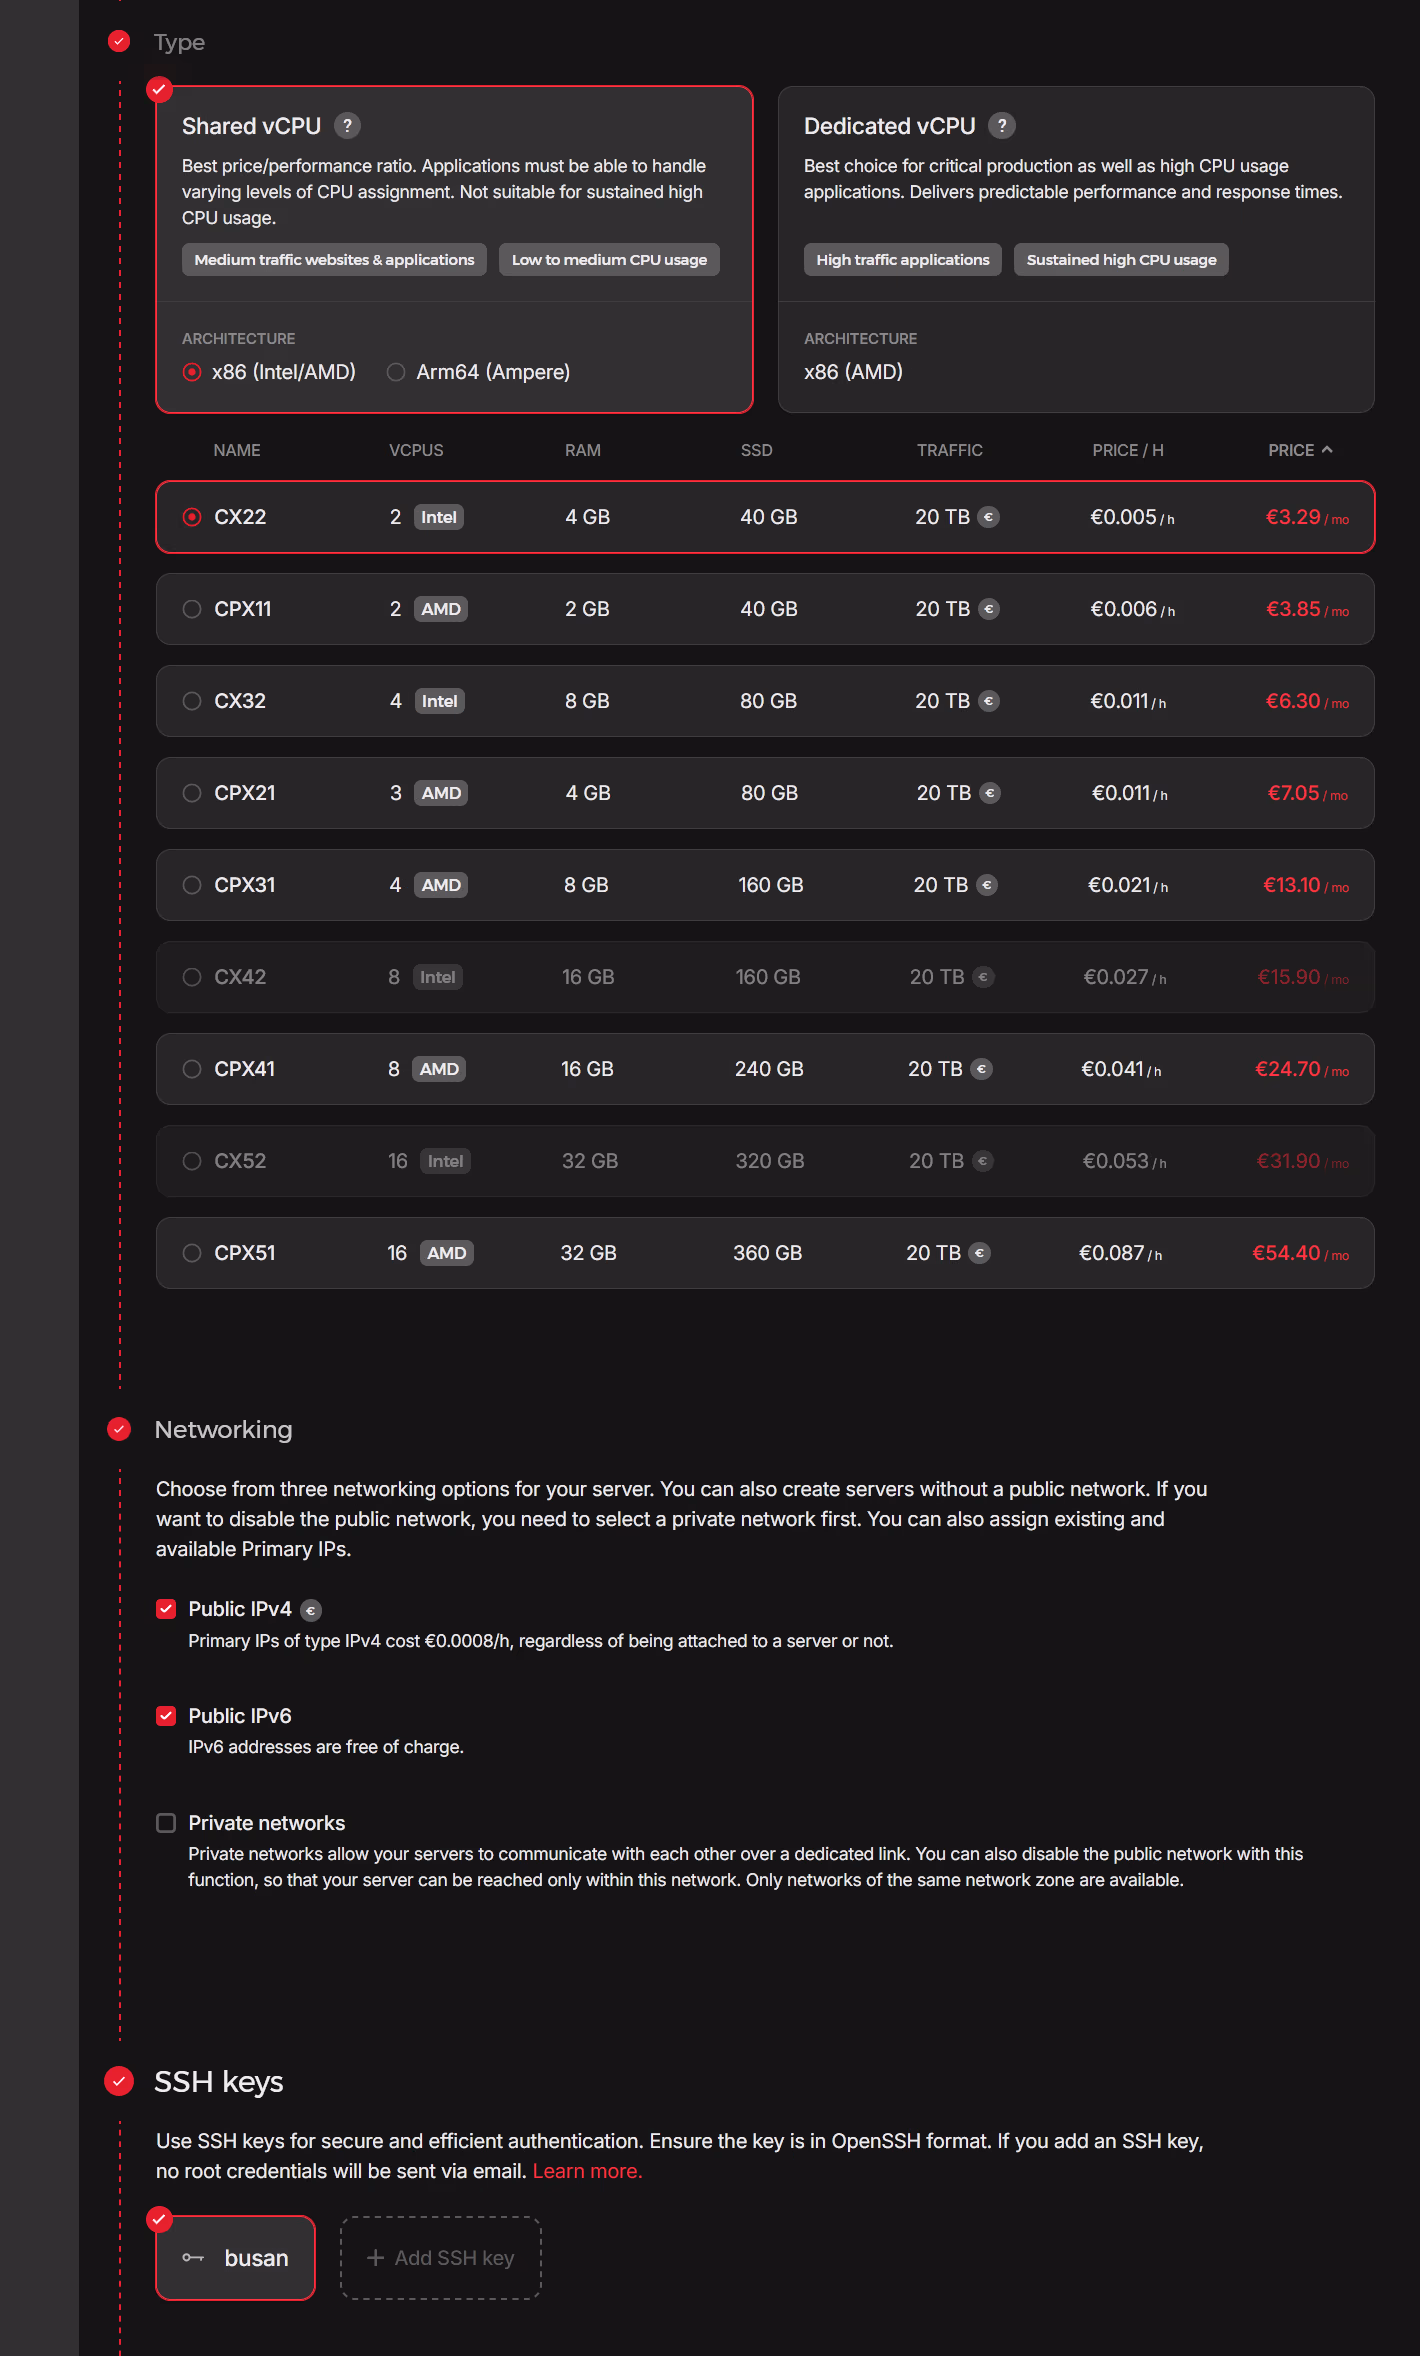
The next stage is to select the Server Type and Server Size. The Shared CPU is sufficient for our needs and the CX22 is the smallest size available. The Networking is left as default but note that I have added my own SSH key for ease of use and good security practice:
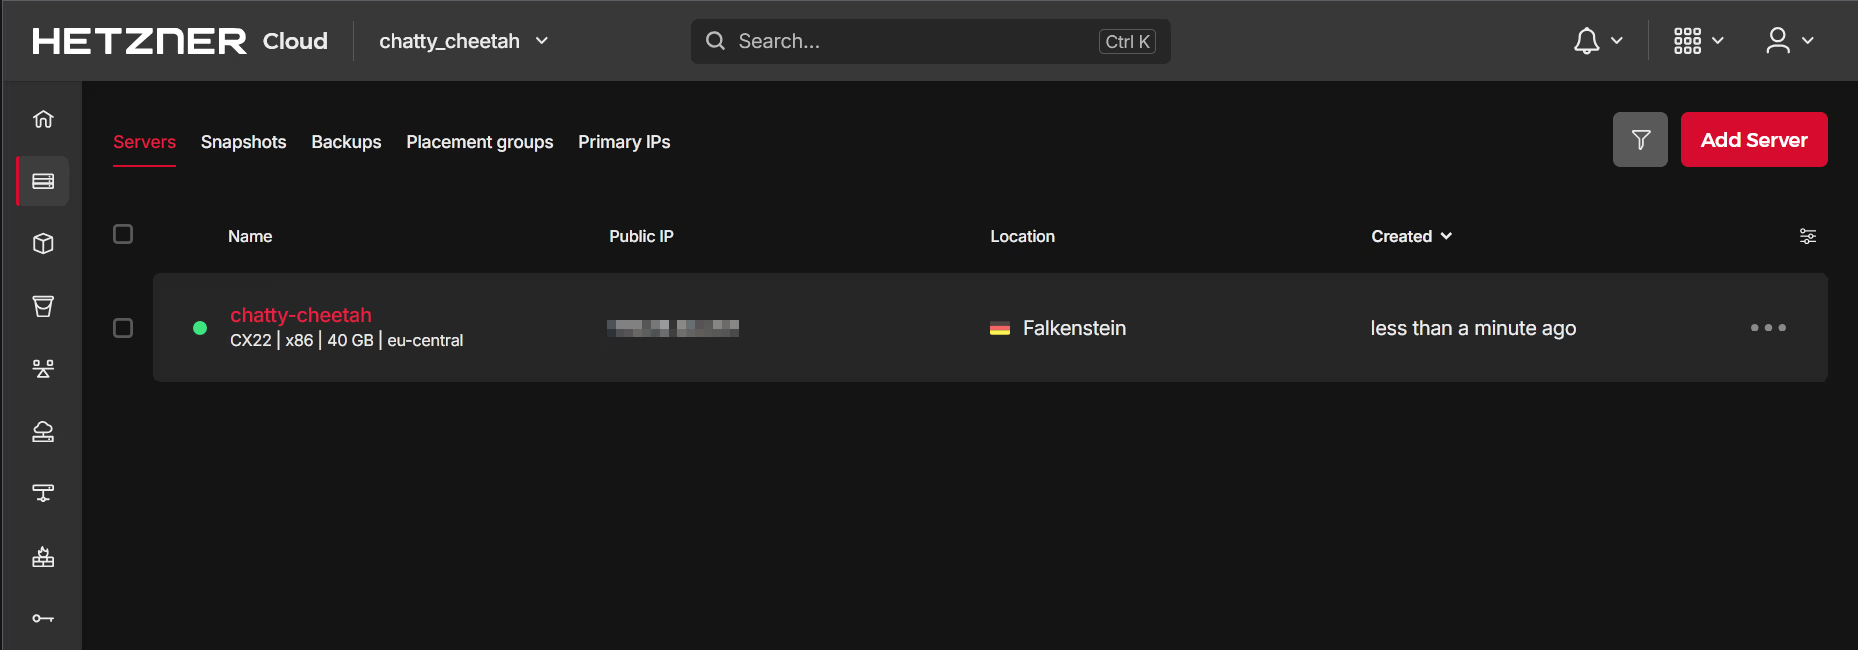
It takes a few moments for the server to be provision and available on the dashboard:
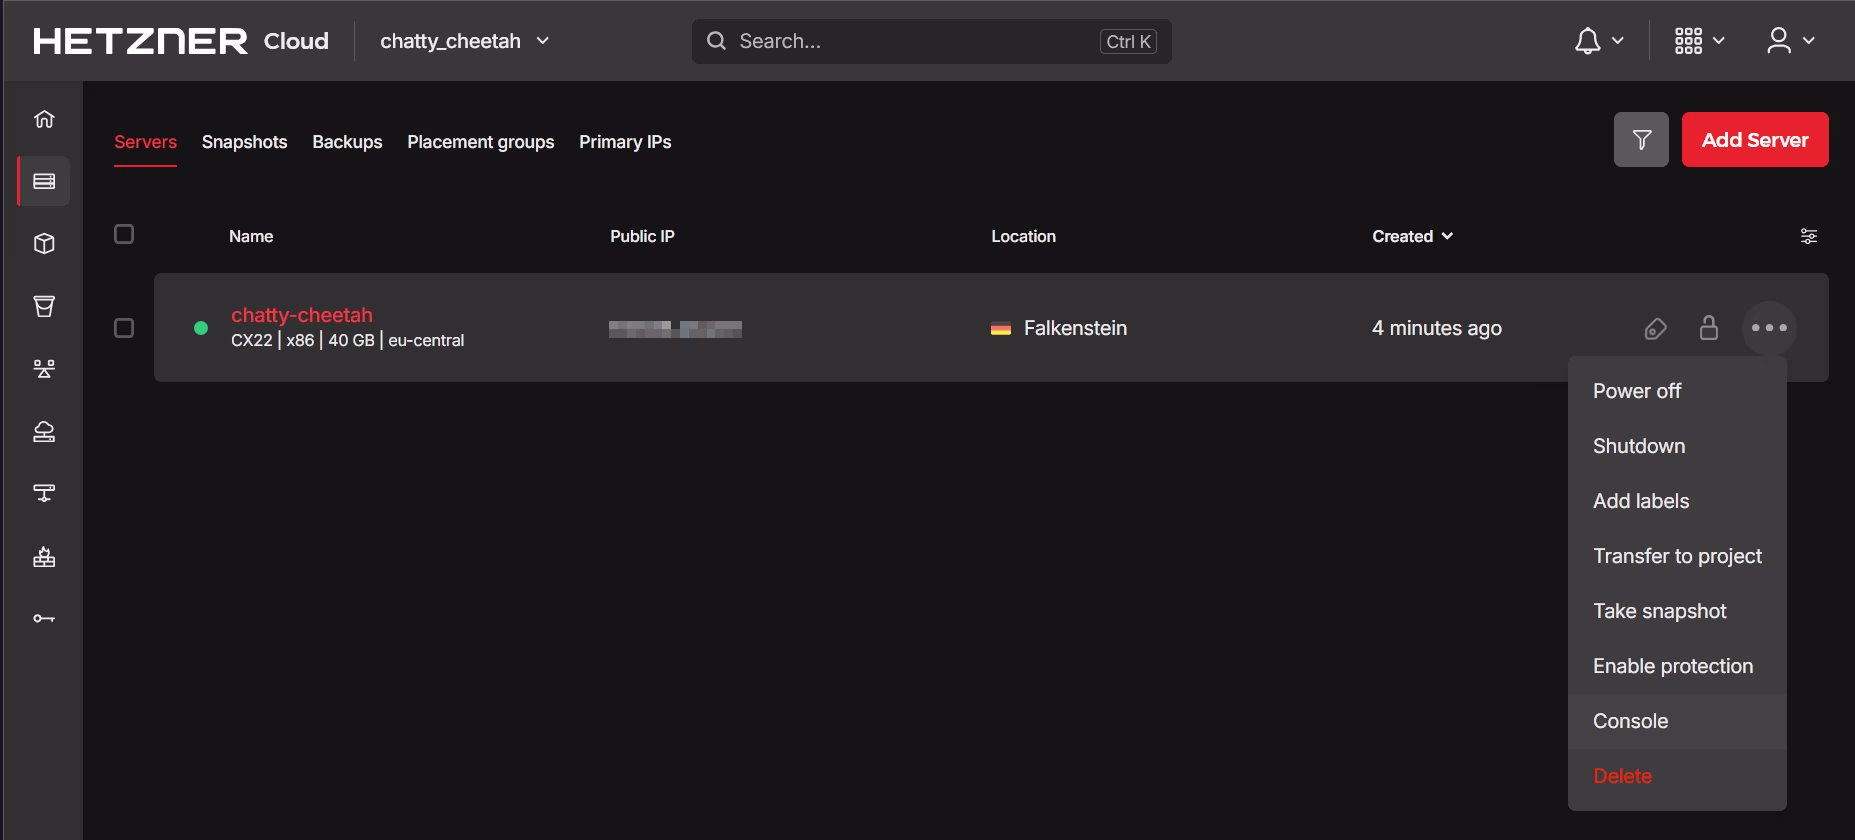
Access Cloud Server
The server can be accessed via a web based Secure SHell (SSH) called the Console or using a traditional CLI tool:
Either approach is valid, but it may be more convenient to use the CLI approach. In most Linux based environments, the SSH client configuration file is located at ~/.ssh/config and can be used to store the server details:
~/ssh/config
Host chatty-cheetah
   HostName 159.69.44.137
   User root
   Port 22
   IdentityFile /home/<user>/.ssh/id_busan.ed25519
   IdentitiesOnly yes
All of the IP addresses, passwords, keys and other credentials have either be altered or replaced and therefore these are just illustrations.
Login using the simplified command of ssh <shortcut>:
# Login in to the server
ssh chatty-cheetah

The authenticity of host '159.69.48.207 (159.69.48.207)' can't be established.
ED25519 key fingerprint is SHA256:fj0zxem5nL8lRqusB5OW1Nrv8Jq5kH5vjswe2cLxROY.
This key is not known by any other names
Are you sure you want to continue connecting (yes/no/[fingerprint])? yes

Warning: Permanently added '159.69.48.207' (ED25519) to the list of known hosts.
Enter passphrase for key '/home/<user>/.ssh/id_busan.ed25519':
Welcome to Ubuntu 24.04.2 LTS (GNU/Linux 6.8.0-54-generic x86_64)

 * Documentation:  https://help.ubuntu.com
 * Management:     https://landscape.canonical.com
 * Support:        https://ubuntu.com/pro

 System information as of Sun Mar  9 11:00:10 AM UTC 2025

  System load:  0.0               Processes:             120
  Usage of /:   3.0% of 37.23GB   Users logged in:       0
  Memory usage: 4%                IPv4 address for eth0: 159.69.48.207
  Swap usage:   0%                IPv6 address for eth0: 2a01:5f8:c222:222b::1


Expanded Security Maintenance for Applications is not enabled.

0 updates can be applied immediately.

Enable ESM Apps to receive additional future security updates.
See https://ubuntu.com/esm or run: sudo pro status


The list of available updates is more than a week old.
To check for new updates run: sudo apt update

root@chatty-cheetah:~#
The above command demonstrates we have access, however remotely connecting using the Administrator or root account isn’t good security practice. We therefore need to make a number of changes to secure the server:
- Install the latest updates
- Add a non-root user
- Secure SSH settings
Update Software
Install the latest operating system and security updates:
# Update software
apt update && upgrade -y

<snip>
/etc/kernel/postinst.d/initramfs-tools:
update-initramfs: Generating /boot/initrd.img-6.8.0-55-generic
/etc/kernel/postinst.d/zz-update-grub:
Sourcing file `/etc/default/grub'
Generating grub configuration file ...
Found linux image: /boot/vmlinuz-6.8.0-55-generic
Found initrd image: /boot/initrd.img-6.8.0-55-generic
Found linux image: /boot/vmlinuz-6.8.0-54-generic
Found initrd image: /boot/initrd.img-6.8.0-54-generic
Adding boot menu entry for UEFI Firmware Settings ...
done
Processing triggers for initramfs-tools (0.142ubuntu25.5) ...
update-initramfs: Generating /boot/initrd.img-6.8.0-55-generic
Scanning processes...
Scanning candidates...
Scanning linux images...

Pending kernel upgrade!
Running kernel version:
  6.8.0-54-generic
Diagnostics:
  The currently running kernel version is not the expected kernel version
6.8.0-55-generic.

Restarting the system to load the new kernel will not be handled automatically, so
you should consider rebooting.

Restarting services...
 systemctl restart multipathd.service ssh.service

No containers need to be restarted.

No user sessions are running outdated binaries.

No VM guests are running outdated hypervisor (qemu) binaries on this host.
Add (Normal) User
For this example, we’ll add a user charlie:
# Add user
adduser charlie

info: Adding user `charlie' ...
info: Selecting UID/GID from range 1000 to 59999 ...
info: Adding new group `charlie' (1000) ...
info: Adding new user `charlie' (1000) with group `charlie (1000)' ...
info: Creating home directory `/home/charlie' ...
info: Copying files from `/etc/skel' ...
New password:
Retype new password:
passwd: password updated successfully
Changing the user information for charlie
Enter the new value, or press ENTER for the default
        Full Name []:
        Room Number []:
        Work Phone []:
        Home Phone []:
        Other []:
Is the information correct? [Y/n]
info: Adding new user `charlie' to supplemental / extra groups `users' ...
info: Adding user `charlie' to group `users' ...

# Add to sudoers group
usermod -aG sudo charlie

# Check user details
id charlie

uid=1000(charlie) gid=1000(charlie) groups=1000(charlie),27(sudo),100(users)
In addition to creating a new user (adduser), we have added the user to the sudo group to allow for administrative tasks. The id command confirms the user has been created and added to the correct groups.
As we’ve used a pre-defined SSH key already, currently this is associated with the root user only and we need to migrate a copy of the Public Key for the user charlie. This can be achieved by copying the authorized_keys file from the root user to the charlie user and fixing the permissions:
# Check existing authorized keys
cat ~/.ssh/authorized_keys

ssh-ed25519 AAAAC3NzaC1lZDI1NTE5AAAAIL9ibwogjh/xXRF4YFNb+k6nDENBAMefDVv7v1Vnz/ff

# Switch user
root@chatty-cheetah:~# su charlie

To run a command as administrator (user "root"), use "sudo <command>".
See "man sudo_root" for details.

charlie@chatty-cheetah:/root$

# Navigate home and create a .ssh directory
cd && mkdir .ssh

# Copy the authorized keys using sudo
sudo cp /root/.ssh/authorized_keys ~/.ssh/config

# Update permissions
sudo chmod 744 ~/.ssh
sudo chown charlie:charlie ~/.ssh/authorized_keys
We can now update our local SSH configuration to include the new user - note we’ve preserved the old settings in case of an error:
~/ssh/config
Host chatty-cheetah-root
   HostName 159.69.44.137
   User root
   Port 22
   IdentityFile /home/<user>/.ssh/id_busan.ed25519
   IdentitiesOnly yes

Host chatty-cheetah
   HostName 159.69.44.137
   User charlie
   Port 22
   IdentityFile /home/<user>/.ssh/id_busan.ed25519
IdentitiesOnly yes- Duplicate the original entry
- Rename the original entry and add the term
-root. - Update entry to include the new
User
Confirm access using ssh:
# Test connection as normal user
ssh chatty-cheetah

# Enter password protecting local key
Enter passphrase for key '/home/<user>/.ssh/id_busan.ed25519':

Welcome to Ubuntu 24.04.2 LTS (GNU/Linux 6.8.0-54-generic x86_64)

 * Documentation:  https://help.ubuntu.com
 * Management:     https://landscape.canonical.com
 * Support:        https://ubuntu.com/pro

 System information as of Sun Mar  9 11:28:33 AM UTC 2025
Update Locale
To ensure the operating system uses the same date, time and currency formats, we need to ensure the locale is consistent with our location, in this case the UK. However, by default the locale is set to en_US.UTF-8:
# Existing setup
localectl

System Locale: LANG=en_US.UTF-8
    VC Keymap: (unset)
   X11 Layout: us
    X11 Model: pc105


# Available installed locales
locale -a
C
C.utf8
en_US.utf8
POSIX
The UK locale doesn’t appear to be installed, so we need to generate it:
# Reconfigure locales
sudo dpkg-reconfigure locales
The Terminal User Interface (TUI) shows the available locales; we can select the en_GB.UTF-8 and deselect the en_US.UTF-8:
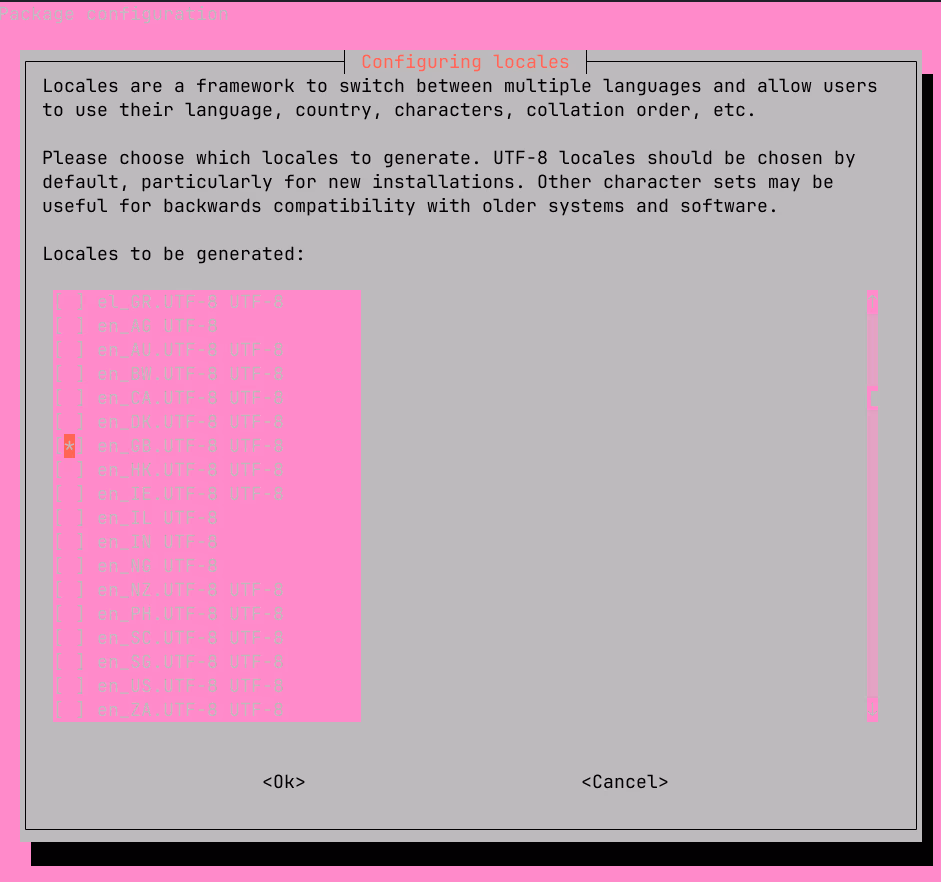
Select the new default locale (as we deselected the original):
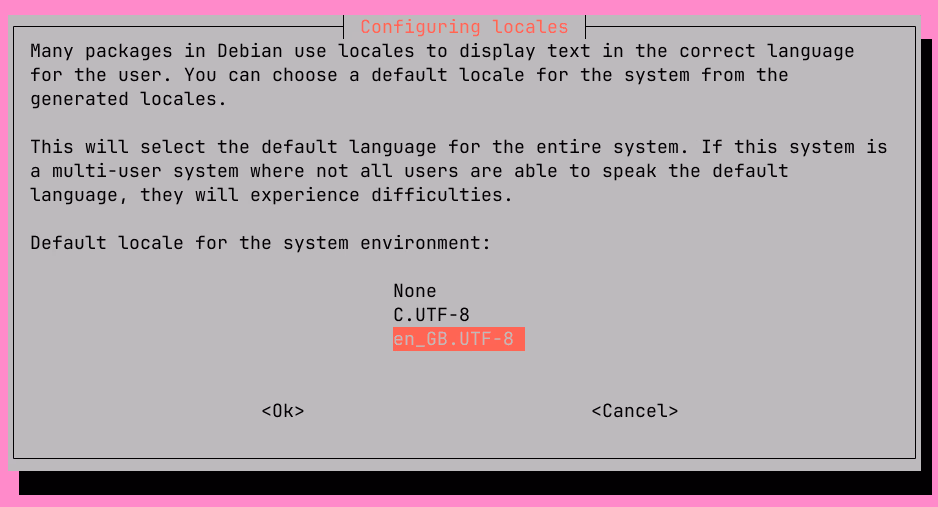
The terminal will now show the new locale:
# Reconfigure locales
sudo dpkg-reconfigure locales

Generating locales (this might take a while)...
  en_GB.UTF-8... done
Generation complete.

# Check locale settings
localectl

System Locale: LANG=en_GB.UTF-8
    VC Keymap: (unset)
   X11 Layout: us
    X11 Model: pc105

# Install language pack
sudo apt install language-pack-en

# Update locales
sudo update-locale

# Check all locale settings
locale

LANG=en_GB.UTF-8
LANGUAGE=
LC_CTYPE="en_GB.UTF-8"
LC_NUMERIC="en_GB.UTF-8"
LC_TIME="en_GB.UTF-8"
LC_COLLATE="en_GB.UTF-8"
LC_MONETARY="en_GB.UTF-8"
LC_MESSAGES="en_GB.UTF-8"
LC_PAPER="en_GB.UTF-8"
LC_NAME="en_GB.UTF-8"
LC_ADDRESS="en_GB.UTF-8"
LC_TELEPHONE="en_GB.UTF-8"
LC_MEASUREMENT="en_GB.UTF-8"
LC_IDENTIFICATION="en_GB.UTF-8"
LC_ALL=

# Set LC_ALL manually
sudo update-locale LC_ALL=en_GB.UTF-8

# Check output
cat /etc/locale.conf

LANG=en_GB.UTF-8
LC_ALL=en_GB.UTF-8
The first set of changes were insufficient as they covered some of the settings therefore we had to install both a language pack and manually set the environmental variable LC_ALL.
At this stage it’s good to sudo reboot the server to finishing installing the updates and complete the locale setup.
Secure Cloud Server
The primary access mechanism is SSH followed by any services deployed via HTTPS. We need to change the default SSH configuration to follow best practices from Mozilla [3]. On an Ubuntu server the easiest method is to add an additional configuration file to /etc/ssh/ssh_config.d/ with a file called 10_baseline.conf consisting of the following using a CLI editor of your choice (e.g. nano or vim):
/etc/ssh/ssh_config.d/10_baseline.conf
# Default Port
Port 62101

# Restrict IPv4 Address
ListenAddress 127.0.0.1
ListenAddress <IP Address of the Server>

# Restrict IPv6 Address (if used)
ListenAddress <IP V6 Address>::2

# Use modern SSH Host Key
HostKey /etc/ssh/ssh_host_ed25519_key

# Use modern algorithms
KexAlgorithms curve25519-sha256@libssh.org,ecdh-sha2-nistp521,ecdh-sha2-nistp384,ecdh-sha2-nistp256,diffie-hellman-group-exchange-sha256

Ciphers chacha20-poly1305@openssh.com,aes256-gcm@openssh.com,aes128-gcm@openssh.com,aes256-ctr,aes192-ctr,aes128-ctr

MACs hmac-sha2-512-etm@openssh.com,hmac-sha2-256-etm@openssh.com,umac-128-etm@openssh.com,hmac-sha2-512,hmac-sha2-256,umac-128@openssh.com

# Increase log level to VERBOSE
LogLevel VERBOSE

# Limit authentication options and remove root
PasswordAuthentication no
PermitRootLogin no
MaxAuthTries 3
X11Forwarding no
PrintMotd no
AllowUsers <user>

# Disable SFTP (Optional)
# This needs the SFTP line to be commented out on the main config
Subsystem sftp /bin/false
The key changes are:
- Restrict the IP address that will permit SSH access. Useful if using more than one IP address (especially IPv6).
- Uncommon port number to reduce the number of automated attacks.
- Modern host key and algorithms.
- Disable
rootlogin and password authentication to prevent brute force attacks. - No desktop forwarding.
- Restricted users to a single user.
- Disable SFTP.
We need to choose a stronger start point for the secure keys, which means in practice the moduli size needs to be increased to 3071 bits or more. The existing keys need to be deleted and new keys generated:
# Switch to root user
sudo -i

# Increase the moduli size
awk '$5 >= 3071' /etc/ssh/moduli > /etc/ssh/moduli.tmp && mv /etc/ssh/moduli.tmp /etc/ssh/moduli

# Delete existing host keys
rm -v /etc/ssh/ssh_host_*

removed '/etc/ssh/ssh_host_ecdsa_key'
removed '/etc/ssh/ssh_host_ecdsa_key.pub'
removed '/etc/ssh/ssh_host_ed25519_key'
removed '/etc/ssh/ssh_host_ed25519_key.pub'
removed '/etc/ssh/ssh_host_rsa_key'
removed '/etc/ssh/ssh_host_rsa_key.pub'

# Regenerate host keys
dpkg-reconfigure openssh-server

Creating SSH2 ED25519 key; this may take some time ...
256 SHA256:amFjeNKXOr4HU87LsmOC/oJdsKwI9C+v01UcDuxX4QA root@chatty-cheetah (ED25519)

# Confirm that the *only* key is the ED25519
ls /etc/ssh/ssh_host_*

/etc/ssh/ssh_host_ed25519_key  /etc/ssh/ssh_host_ed25519_key.pub
Before applying the new configuration ensure you have one terminal logged into the server then update the local config file:
~/.ssh/config
Host chatty-cheetah-old
   HostName 159.69.44.137
   User charlie
   Port 22
   IdentityFile /home/<user>/.ssh/id_busan.ed25519
   IdentitiesOnly yes

Host chatty-cheetah
   HostName 159.69.44.137
   User charlie
   Port 62101
   IdentityFile /home/<user>/.ssh/id_busan.ed25519
   IdentitiesOnly yes
Note the Port has been updated to 62101 as per the updated config file. Restart the ssh service and login in a new terminal to ensure the settings have worked:
# Restart the ssh service
systemctl restart ssh
In a new terminal, test the new settings:
# Login
ssh chatty-cheetah

# Agree to the change in fingerprint
The authenticity of host '[<IP Address>]:<Port Number> ([<IP Address>]:<Port Number>)' can't be established.
ED25519 key fingerprint is SHA256:amFjeNKXOr4HU87LsmOC/oJdsKwI9C+v01UcDuxX4QA.
This key is not known by any other names
Are you sure you want to continue connecting (yes/no/[fingerprint])? yes

# Note the change is added to the known hosts file
Warning: Permanently added '[<IP Address>]:<Port Number>' (ED25519) to the list of known hosts.
Enter passphrase for key '/home/miah0x41/.ssh/id_busan.ed25519':

Welcome to Ubuntu 24.04.2 LTS (GNU/Linux 6.8.0-55-generic x86_64)

 * Documentation:  https://help.ubuntu.com
 * Management:     https://landscape.canonical.com
 * Support:        https://ubuntu.com/pro

 System information as of Sun  9 Mar 16:08:38 UTC 2025
Conclusion
The guide shows how to use Hetzner services to create a project, attach resources such as a server and then configure it for secure access. The next part of the series will cover the installation of podman and traefik to manage containers and enable secure HTTPS access.
Version History
2025-08-29- Typos and minor corrections.2025-08-28- Removed old branding and added CDP assets.2025-03-09- Original
Attribution
Images based on:
- Image by chiến nguyễn bá from Pixabay
Images used in this post have been generated using multiple Machine Learning (or Artificial Intelligence) models and subsequently modified by the author.
Where ever possible these have been identified with the following symbol:

References
Citation
@online{miah2025,
  author = {Miah, Ashraf},
  title = {*ChatGPT* {Alternative:} {Part} 1 - {Creating} {A} {Cloud}
    {Server} for {Hosting}},
  date = {2025-03-09},
  url = {https://blog.curiodata.pro/posts/12-hetzner-cloud-server/},
  langid = {en}
}